Product & Updates
How to Add Video to Your Online Course (YouTube, Vimeo, or Self-Hosted)
July 17, 2026
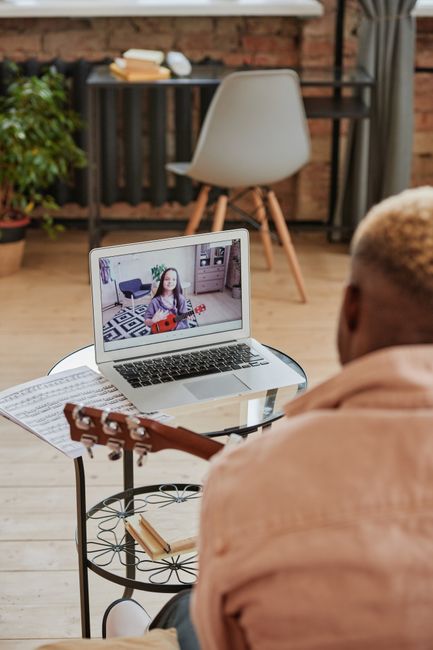
You've recorded a demo, a talking-head intro or a screen capture, and now you need it inside your course where learners will actually watch it. The mechanics aren't hard, but the choices you make up front — embed or self-host, which provider, what quality — affect load times, reliability and whether your video still plays in two years' time. Let's work through it properly.
The big decision: embed or self-host
Almost every course video question comes back to one fork in the road. You either embed a video that lives on a platform like YouTube or Vimeo, or you host the actual video file yourself.
Embedding means the video file sits on YouTube or Vimeo's servers, and your course shows a player that pulls it in. You paste a link, and their infrastructure does the heavy lifting — streaming, quality switching, global delivery.
Self-hosting means the video file travels inside your course package or sits on your own storage. Your learners' devices download or stream it directly from you, with no third party involved.
Neither is automatically right. It depends on where your course runs, who watches it, and how much control you need.
When embedding from YouTube or Vimeo makes sense
For most creators, embedding is the path of least resistance — and often the better one. Here's why it works:
- It keeps your course light. Video files are huge. A ten-minute clip can run to hundreds of megabytes. Embedding keeps that weight out of your course package entirely.
- Streaming is handled for you. YouTube and Vimeo automatically serve the right quality for each learner's connection, so someone on patchy mobile data still gets a watchable experience.
- It's reliable at scale. If a hundred people open your course at once, the provider's servers absorb that load, not yours.
The trade-off is that you're depending on a third party. YouTube shows related videos and the occasional ad unless you configure it carefully, and corporate firewalls sometimes block it. Vimeo is cleaner and more professional but the useful privacy features sit behind paid plans.
When self-hosting is worth the hassle
Self-hosting gives you control and independence, which matters in a few specific situations:
- Restricted networks. Plenty of workplaces, hospitals and government sites block YouTube and Vimeo outright. If your audience sits behind that kind of firewall, a self-hosted file may be the only thing that plays.
- Offline or air-gapped delivery. If learners open your course without internet access, an embedded video simply won't load. A bundled file will.
- Confidential content. If the video shouldn't live on a public platform at all, keeping it inside your own package keeps it private.
The cost is real, though. Self-hosted video bloats your course file, can be slow to load on weak connections, and won't adapt quality the way a streaming provider does. You're trading convenience for control.
Adding video with CourseConverter's video block
CourseConverter handles both approaches through its video block, so you don't have to pick a side before you start. The workflow looks like this:
- Drop a link into your Word document where you want the video to appear. Paste the full YouTube or Vimeo URL on its own line. CourseConverter recognises it and converts it into an embedded player in the finished course.
- Or insert your own video file if you're self-hosting. Place the file reference in your document and CourseConverter bundles it into the course package so it travels with everything else.
- Convert your document as normal. The video block is generated automatically — you don't need to touch any embed code or HTML.
- Preview before you publish. Always open the converted course and play the video end to end. This is where you catch a wrong link, a private Vimeo setting, or a file that didn't bundle correctly.
Because everything starts in Word, you can position your course video exactly where the supporting text needs it — after the explanation, before the quiz, wherever it makes sense for the learner.
Getting the video itself right
The provider and the embed are only half the job. The video has to be watchable on whatever screen your learner is using.
- Export at 1080p for most courses. It's sharp enough for screen recordings and talking heads without producing a monster file. Save 4K for cases where fine detail genuinely matters.
- Keep clips short. Several short videos beat one long one. Learners can find what they need, and shorter files load faster if you're self-hosting.
- Add captions. Many people watch with the sound off, and captions make your course accessible to learners who need them. YouTube and Vimeo both let you upload caption files to embedded videos.
- Record clean audio. Learners forgive average video far more readily than bad sound. A cheap external microphone makes a bigger difference than a better camera.
Performance and the learner experience
How a course video feels to watch comes down to a few practical things.
For embedded video, performance is mostly out of your hands — and that's usually good. The provider streams adaptively, so a learner on a slow connection gets a lower-quality version that still plays smoothly rather than a frozen high-res file. Your main job is making sure the embed isn't blocked on their network.
For self-hosted video, performance is your responsibility. A large file on a weak connection can stall, buffer or fail to load. If you self-host, compress your files sensibly and resist the urge to bundle a dozen long clips into one course. Test it on a slow connection, not just your office wifi.
Either way, don't autoplay video. It startles people, eats data, and is a genuine accessibility problem. Let learners press play when they're ready.
Things worth knowing before you commit
- Privacy settings catch people out. A Vimeo video set to private, or a YouTube video set to "private" rather than "unlisted", won't play for your learners. Use unlisted on YouTube and the appropriate privacy controls on Vimeo.
- Embeds can disappear. If you delete the video from YouTube or Vimeo later, the embed in your course goes blank. Self-hosted files don't have this problem — but they also don't get fixed automatically if you update the source.
- SCORM and offline don't mix with embeds. If your course will run offline or inside an LMS with no internet, embedded video won't load. Self-host in those cases.
- Check it on mobile. A surprising amount of course viewing happens on phones. Confirm your video plays and the controls are usable on a small screen.
The takeaway
For most creators, embedding from YouTube or Vimeo is the simplest, most reliable way to add a course video — it keeps your package light and lets the provider handle streaming. Reach for self-hosting when your audience is behind a firewall, working offline, or watching confidential content. CourseConverter's video block supports both, so you can choose per video based on where your course actually runs. Whatever you pick, export at sensible quality, add captions, skip autoplay, and always preview the finished course before you ship it.